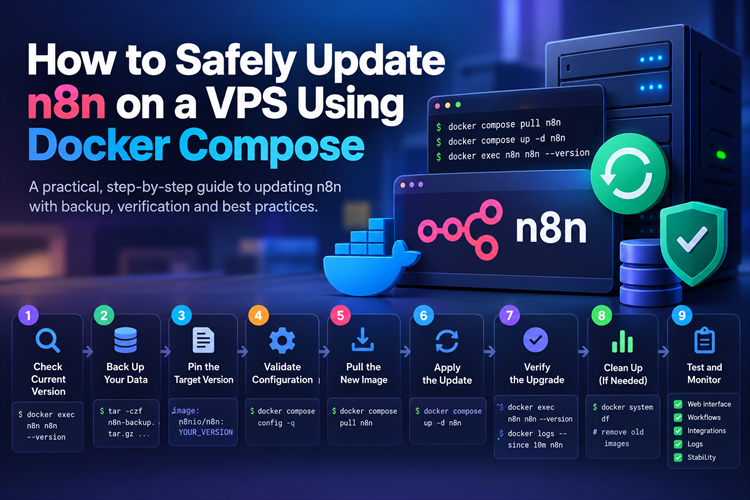
How to Safely Update n8n on a Self-Hosted VPS Using Docker Compose
Updating a self-hosted n8n instance is more than pulling the latest Docker image and restarting a container. A safe upgrade should include a backup, version control, configuration validation, a controlled deployment and post-update testing.
In this guide, I’ll walk through the process I followed to update n8n on a Linux VPS using Docker Compose, while keeping the existing workflows and configuration intact.
The aim is simple: update n8n safely, verify that it works, and retain a way to recover if something goes wrong.
1. Understand the deployment before updating
Before changing anything, identify how n8n is running.
This example assumes:
-
Ubuntu Server or another Linux distribution.
-
Docker and the Docker Compose plugin.
-
n8n running in a Docker container.
-
Persistent storage for n8n data.
-
A reverse proxy and HTTPS configured separately.
Check the running containers:
sudo docker psCheck the installed n8n version:
sudo docker exec n8n n8n --version
The output confirms which version is currently running.
Why this matters: You need to know the current version and deployment method before deciding how to upgrade. Docker Compose deployments should generally be managed through their Compose configuration rather than by manually replacing containers.
Note: In these examples, n8n is the container name. Replace it if your deployment uses a different name.
2. Back up the existing installation
A backup is essential because an upgrade can introduce compatibility problems or expose issues that were not apparent beforehand.
For a typical Docker Compose installation, identify:
-
The directory containing the persistent n8n data.
-
The Docker Compose file.
-
The location where backups will be stored.
For example, if the deployment uses /opt/n8n and stores its data in /opt/n8n/data, create a backup directory:
sudo mkdir -p /opt/n8n/backups
sudo chmod 700 /opt/n8n/backups
Back up the persistent data and Compose configuration:
sudo tar -czf /opt/n8n/backups/n8n-backup-$(date +%Y%m%d-%H%M%S).tar.gz \
  -C /opt/n8n data docker-compose.yml
Check that the archive exists:
sudo ls -lh /opt/n8n/backups/Check the archive's integrity:
sudo tar -tzf /opt/n8n/backups/YOUR_BACKUP_FILE.tar.gz > /dev/null \
  && echo "Backup archive is valid"
Replace YOUR_BACKUP_FILE.tar.gz with the actual archive name.
Important: A valid archive is not the same as a fully tested recovery. For critical systems, document the restore process and test it in a safe environment. If your deployment uses external volumes, custom paths or a different database arrangement, adapt the backup accordingly.
3. Avoid using the latest tag for controlled upgrades
Docker images can be referenced using tags such as:
image: n8nio/n8n:latestThe latest tag can move to a different release over time. This makes it harder to know exactly which version a deployment will pull and makes reproducing a previous setup less predictable.
For the upgrade, I changed the image reference to a specific version:
image: n8nio/n8n:YOUR_TARGET_VERSIONReplace YOUR_TARGET_VERSION with the intended release number, after checking the official release notes and compatibility requirements.
Pinning the version gives you more control over upgrades and makes the deployment easier to troubleshoot.
4. Validate the Docker Compose configuration
Before pulling the new image or recreating the container, validate the Compose file:
cd /opt/n8n
sudo docker compose config -q
If the command completes without reporting an error, the Compose configuration has passed this syntax and configuration check.
This does not guarantee that the application will start successfully, but it helps catch configuration mistakes before deployment.
Why this step matters: A small indentation error or an incorrect environment variable in a YAML file can prevent a service from starting.
5. Pull the intended n8n image
Once the backup is available and the Compose configuration is valid, download the selected image:
sudo docker compose pull n8nThis pulls the image specified in the Compose configuration without immediately replacing the running container.
Check the command output for download errors before continuing.
6. Apply the update
Recreate the n8n service using the updated image and existing Compose configuration:
sudo docker compose up -d n8nDocker Compose will reconcile the running service with the configuration. If the image changed, it will recreate the container using the new image while retaining configured persistent storage.
Wait for the service to start before proceeding.
Important: Do not delete the persistent data directory, remove Docker volumes, or generate a new n8n encryption key as part of a routine upgrade. Existing credentials may depend on the original encryption key.
7. Verify the upgrade
A successful command does not, by itself, prove that the application is working correctly.
First, check the version:
sudo docker exec n8n n8n --version
Next, check the container status:
sudo docker psThen review recent logs:
sudo docker logs --since 10m n8nLook for startup errors, database errors, failed migrations, permission issues and repeated restarts. Some warnings may be unrelated to the upgrade, so assess them in context rather than assuming every warning is a failure.
Finally, open the n8n web interface and confirm that:
-
You can sign in.
-
Existing workflows are visible.
-
Credentials and connections still work.
-
A representative test workflow completes successfully.
-
Webhooks and integrations work where applicable.
In my update, I confirmed that the interface and login worked, existing workflows were present, a test publishing workflow succeeded, and the existing external SQL integration continued to work.
These checks were important because they verified application behaviour, not just container status.
8. Review disk space and unused Docker images
Docker image updates can temporarily require additional disk space because the old and new images may coexist.
After confirming that the updated installation works, review Docker's disk usage:
sudo docker system dfThis reports space used by images, containers, local volumes and the build cache.
An old image may remain on disk after an upgrade. It can be removed when you have confirmed that the new installation works and you no longer need the old image for an immediate rollback.
Avoid running broad cleanup commands such as docker system prune -a --volumes without understanding their effects. They can remove resources needed by other services or recovery procedures.
In my case, removing an obsolete image after verification recovered approximately 2.47 GB of disk space.
9. Keep the backup and monitor the installation
Do not delete your recovery backup immediately after an upgrade.
Keep it for an agreed retention period, monitor the application, and confirm that important workflows continue to operate normally. Once the installation has proved stable and the recovery plan is understood, remove old backups according to your retention policy.
Also monitor:
-
RAM and disk usage.
-
Container restart behaviour.
-
Recent n8n logs.
-
Workflow execution failures.
-
Webhook and integration behaviour.
A scheduled full VPS reboot is not automatically necessary after every n8n update. It is generally better to monitor the service and investigate actual problems rather than introduce unnecessary restarts.
10. What I learned from the upgrade
This update reinforced several practical lessons:
-
Back up before changing the deployment.
-
Use a specific image version for predictable upgrades.
-
Validate the configuration before applying it.
-
Preserve persistent data and the existing encryption key.
-
Check logs, workflows and integrations after deployment.
-
Review disk usage instead of blindly deleting Docker resources.
-
Keep a recovery option and monitor the service before declaring the upgrade complete.
A self-hosted automation platform is infrastructure that other workflows depend on. Updating it carefully helps reduce avoidable downtime and makes future maintenance easier.
Final checklist
-
Confirm the current n8n version.
- Create and verify a backup.
-
Check the official release notes.
-
Pin the intended image version.
-
Validate the Compose configuration.
-
Pull the new image.
-
Recreate the service.
-
Verify the version, container and logs.
-
Test the web interface, workflows and integrations.
-
Review disk usage and retain a recovery backup.
The key takeaway: A safe n8n upgrade is not just an image update. It is a controlled process of preparation, deployment, verification and recovery planning.
#n8n #Docker #SelfHosted #Automation #DevOps #Linux
Thanks, for reading the blog, I hope it helps you. Please share this link on your social media accounts so that others can read our valuable content. Share your queries with our expert team and get Free Expert Advice for Your Business today.